Creating a New Ansible Collection: A Step-by-Step Guide
By Luca Berton · Published 2024-01-01 · Category: installation
Create a new Ansible Collection \"test.test\" with ansible-galaxy. Follow steps to initialize, build, and verify the collection, resulting in a distributable.
Introduction
Ansible Collections are a powerful way to organize and distribute your Ansible content, including modules, plugins, roles, and more. They allow you to package and share your automation resources in a structured and reusable manner. In this tutorial, we'll walk you through the process of creating a new Ansible Collection using theansible-galaxy command-line tool.
See also: Crafting and Publishing Your Custom Ansible Collection on Automation Hub
Links
Step by step
Step 1: Installation and Prerequisites
Before you start, ensure that you have Ansible and the ansible-galaxy command-line tool installed on your system. If not, you can install Ansible by following the official documentation. Once installed, you'll be ready to create your new Ansible Collection.
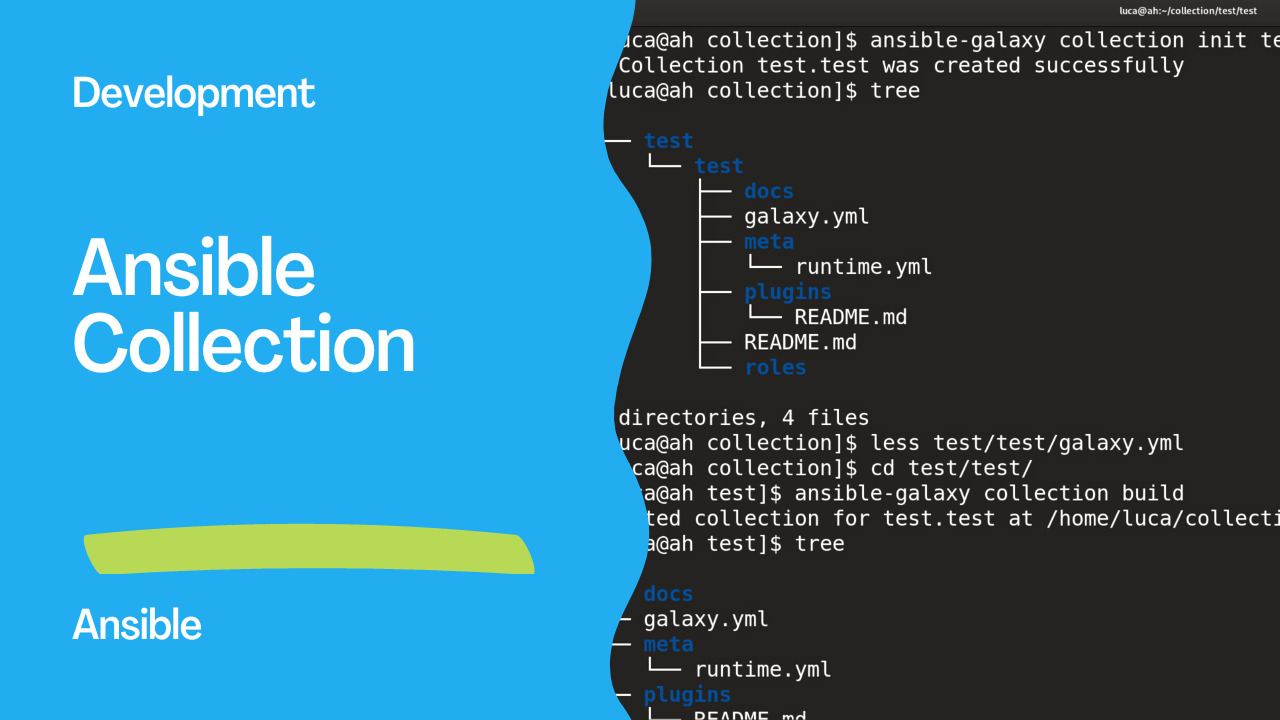
Step 2: Initialize a New Collection To create a new collection, open your terminal and run the following command:
ansible-galaxy collection init test.testThis command initializes a new collection named test.test. You should see an output confirming that the collection was created successfully.
ansible-galaxy collection init test.test
- Collection test.test was created successfully
Step 3: Explore the Collection Structure
After creating the collection, navigate to the collection's directory. You can use the following command:
cd test/testdocs/: This directory is where you can add documentation related to your collection.galaxy.yml: This file contains metadata about your collection, including its name, description, and author information.meta/: This directory stores files related to the metadata of your collection, such as the runtime configuration.plugins/: This directory is where you can add custom plugins.README.md: This file provides information about your collection and its usage.roles/: This directory is where you can add roles specific to your collection.
test/test" directory:
.
└── test
    └── test
        ├── docs
        ├── galaxy.yml
        ├── meta
        │   └── runtime.yml
        ├── plugins
        │   └── README.md
        ├── README.md
        └── roles

6 directories, 4 files
Step 4: Making Necessary Changes
At this point, you can start making the necessary changes to your collection. You can add new modules, plugins, roles, or any other content your automation requires. Modify the galaxy.yml file to reflect your collection's information accurately.
Step 5: Building the Collection It's time to build the collection once you've made the required changes and added your content. Building the collection packages all your content into a distributable archive. In your collection's directory, run the following command:
ansible-galaxy collection buildThis command will create a compressed archive file named after your collection and version, such as test-test-1.0.0.tar.gz.
Created collection for test.test at /home/luca/collection/test/test/test-test-1.0.0.tar.gz
Step 6: Verifying the Build After running the build command, you'll find the archive file in your current directory. You can verify its contents using the following commands:
file test-test-1.0.0.tar.gz
du -hs test-test-1.0.0.tar.gz
tar -tvf test-test-1.0.0.tar.gz$ file test-test-1.0.0.tar.gz
test-test-1.0.0.tar.gz: gzip compressed data, was "test-test-1.0.0.tar", last modified: Wed Aug 9 14:56:25 2023, max compression, original size modulo 2^32 20480
$ du -hs test-test-1.0.0.tar.gz
4.0K test-test-1.0.0.tar.gztest-test-1.0.0.tar.gz" archive:
-rw-r--r-- 0/0             714 2023-08-09 15:56 MANIFEST.json
-rw-r--r-- 0/0            1159 2023-08-09 15:56 FILES.json
-rw-r--r-- 0/0              68 2023-08-09 15:55 README.md
drwxr-xr-x 0/0               0 2023-08-09 15:55 docs/
drwxr-xr-x 0/0               0 2023-08-09 15:55 meta/
-rw-r--r-- 0/0            1374 2023-08-09 15:55 meta/runtime.yml
drwxr-xr-x 0/0               0 2023-08-09 15:55 plugins/
-rw-r--r-- 0/0             963 2023-08-09 15:55 plugins/README.md
See also: Streamline Ansible Development with Auto-Fixing FCQN Violations
Conclusion
Congratulations! You've successfully created a new Ansible Collection namedtest.test and built an archive ready for distribution. You can now share or use your collection on Ansible Galaxy and Automation Hub in your automation projects. Creating and managing Ansible Collections empowers you to efficiently organize and distribute your automation resources, making it easier for you and others to leverage your automation efforts.
Related Articles
Category: installation
Watch the video: Creating a New Ansible Collection: A Step-by-Step Guide — Video Tutorial