Introduction
Ansible, an open-source automation tool, has become a cornerstone in the world of IT automation and configuration management. While Ansible is known for its command-line prowess, some users find comfort in graphical interfaces. For those who prefer a visual approach to managing Ansible Collections, ansible-creator seamlessly integrates with Visual Studio Code (VS Code) and its dedicated Ansible extension. This combination provides an intuitive graphical user interface (GUI) for creating and managing Ansible Collections. In this guide, we will explore the steps to create an Ansible Collection using ansible-creator and the VS Code Ansible extension.
Step 1: Installing ansible-creator in the Environment
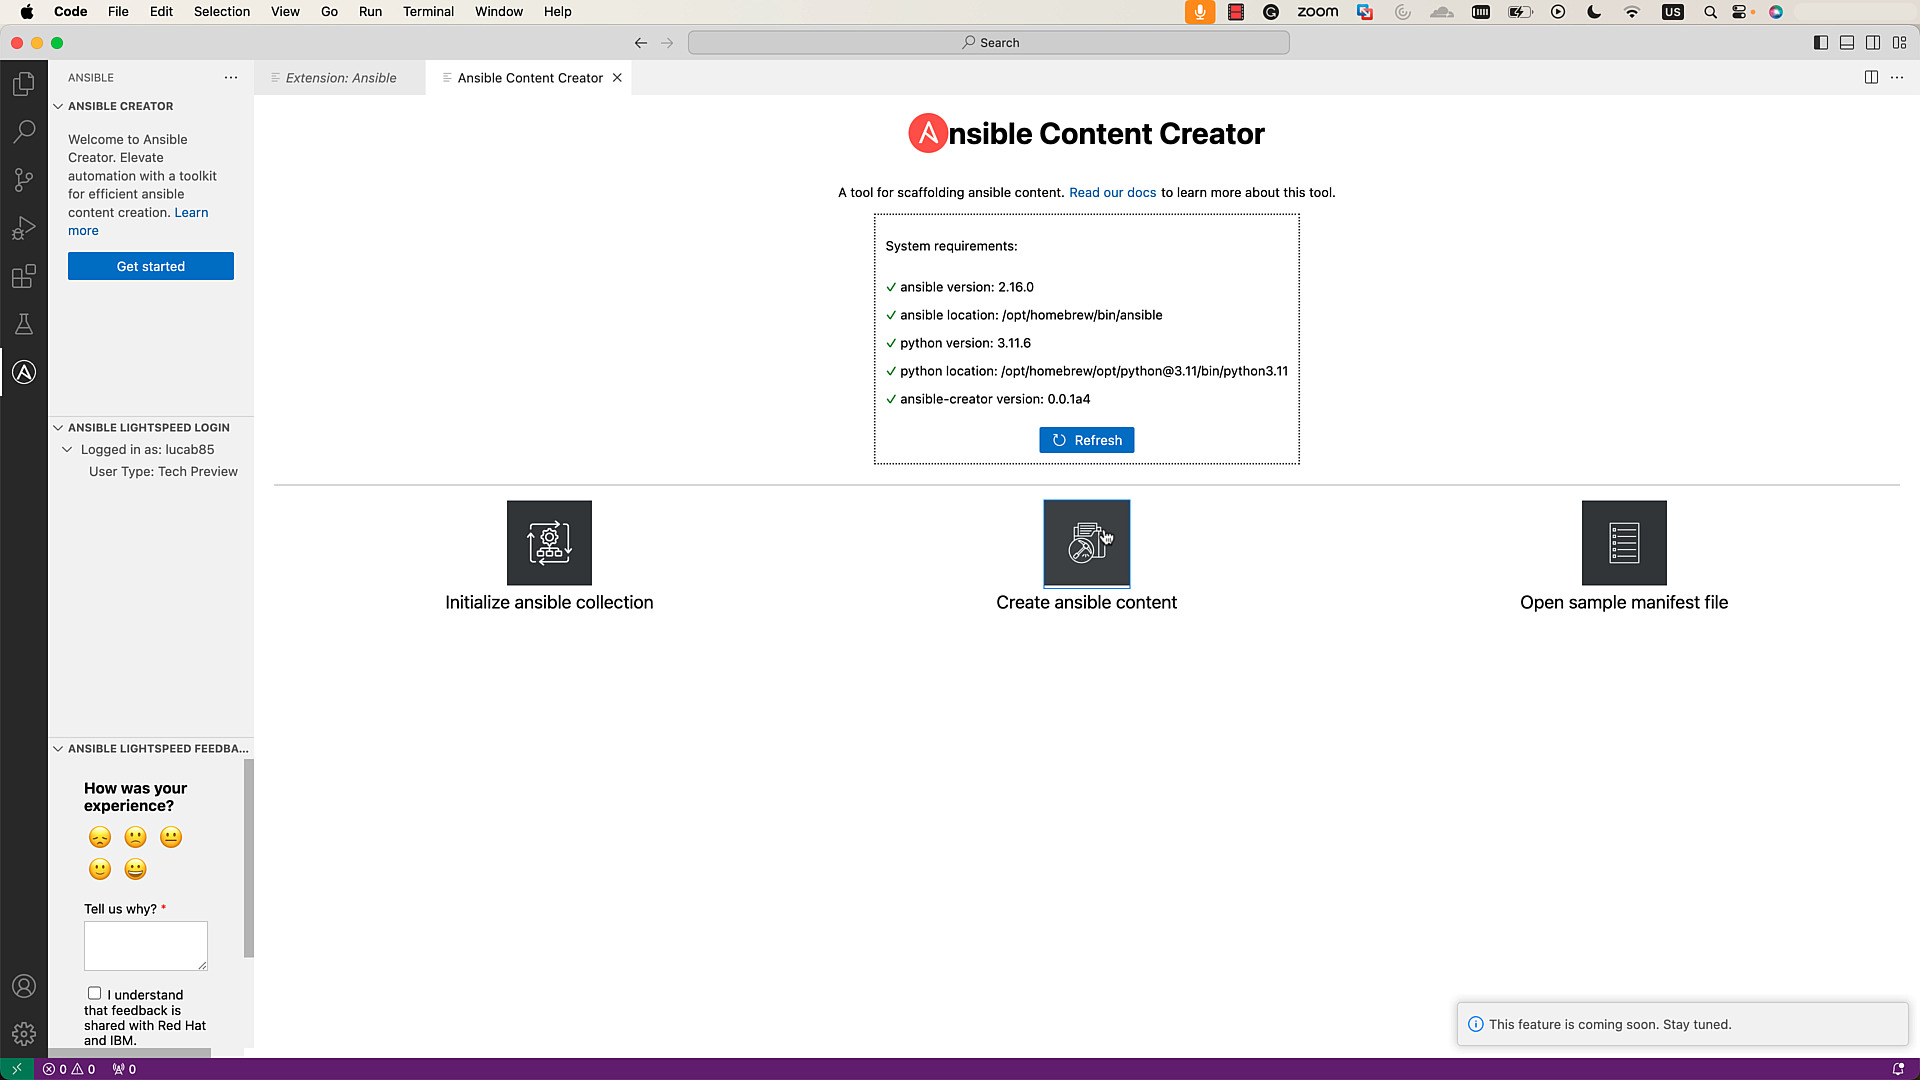
- Open VS Code and navigate to the Ansible icon in the activity bar.
- Click on “Get Started” to access the Ansible Creator section in the editor.
On the Menu page, the System Requirements box displays information about the current environment, including ansible, Python, and ansible-creator. If ansible-creator is not installed, proceed to install it. Ensure that all requirements display green ticks, indicating a ready environment.
Step 2: Initializing Collection by Filling an Interactive Form
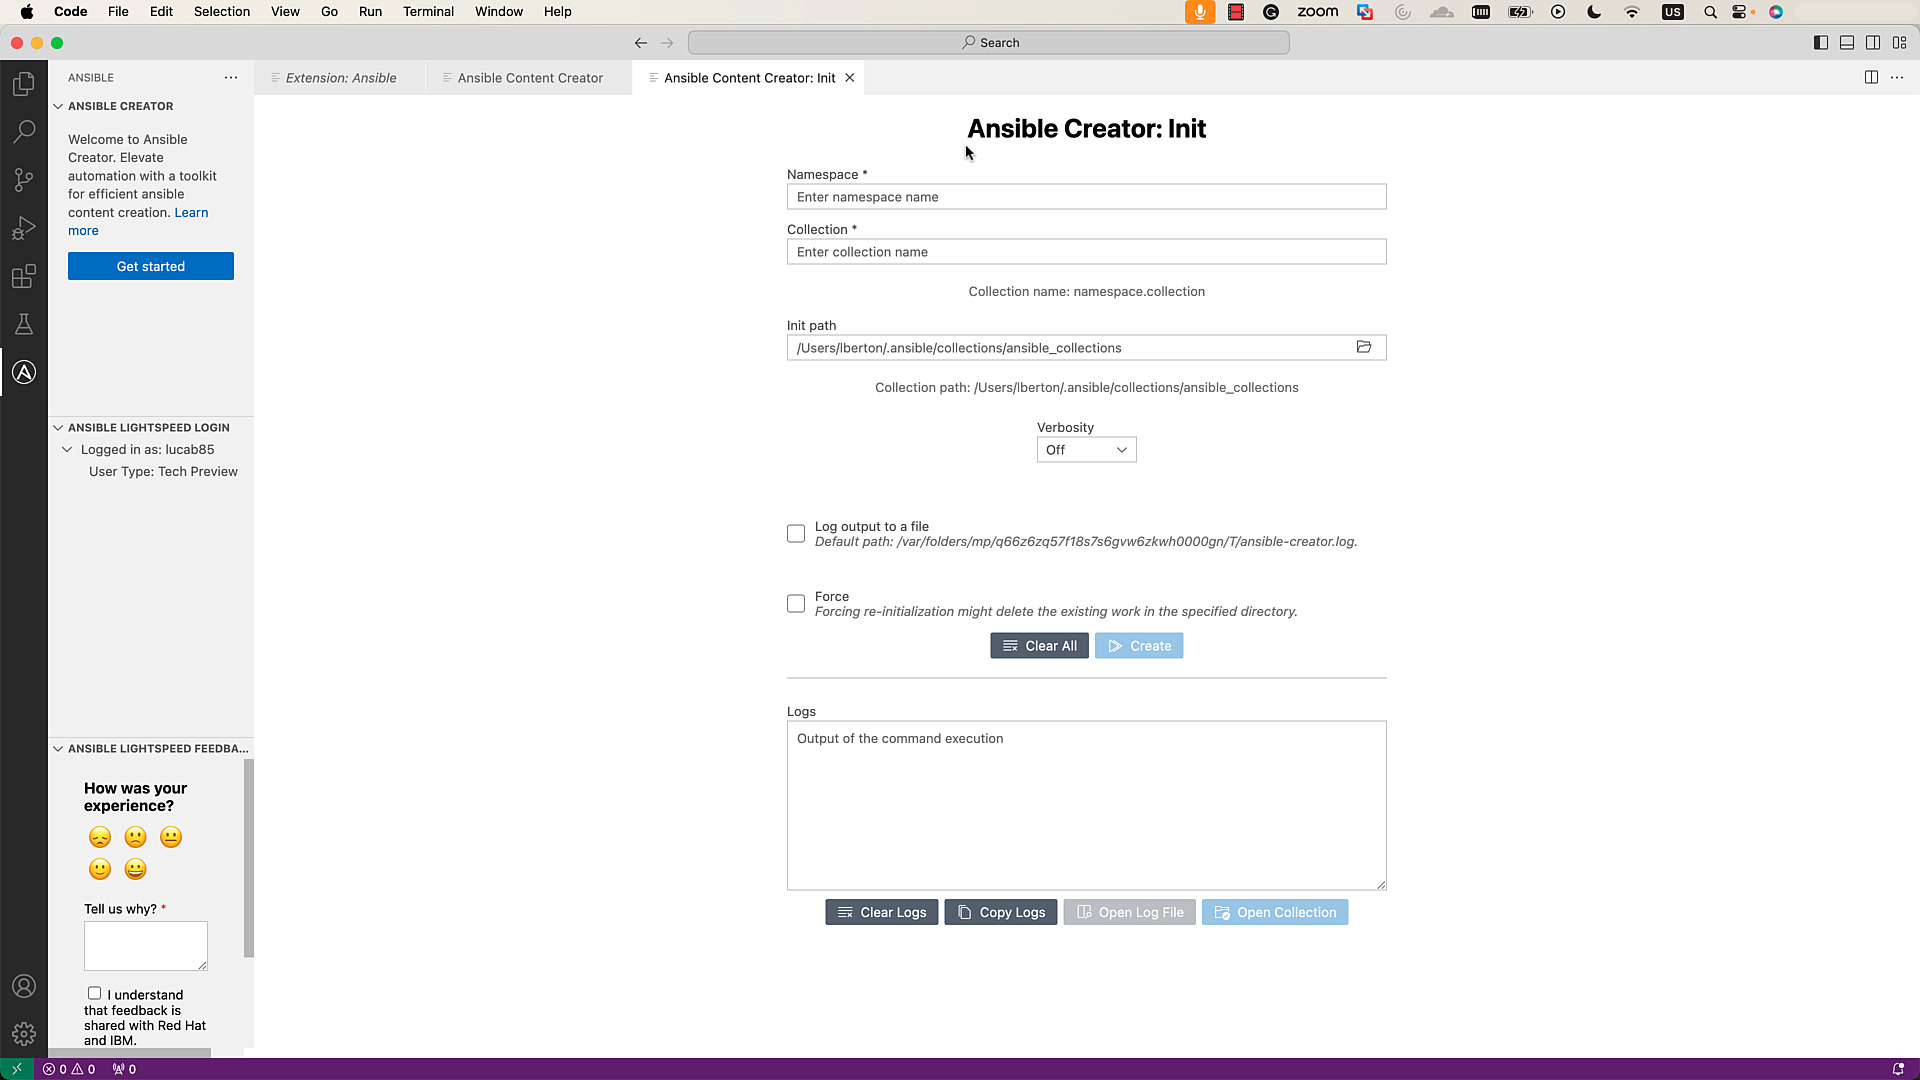
- Click on “Initialize a collection” to access the “Init” interface, providing an interactive form.
- Enter the namespace and collection name, reviewing the format as you type.
- Specify the initialization path by using the folder icon to select the desired location for the collection.
- Set the verbosity of the output using the dropdown options.
- Optionally, log the output to a file by checking the “Log output to a file” option. Additional options for logging will be available.
- To re-scaffold an existing collection, check the “Force” box. This will freshly scaffold the collection with the same name, removing existing content.
- After reviewing the details, click the “Create” button, and the collection will be scaffolded in the specified location.
- Review logs or open the log file (if created) in the VS Code Editor for further scrutiny.

Step 3: Leveraging the Extension’s Ability to Interact with the New Collection
- Once scaffolding is complete, click the “Open Collection” button to add the collection to the current workspace.
- The
galaxy.ymlfile will open in a new tab in the editor. - Start developing the content within the newly scaffolded collection.
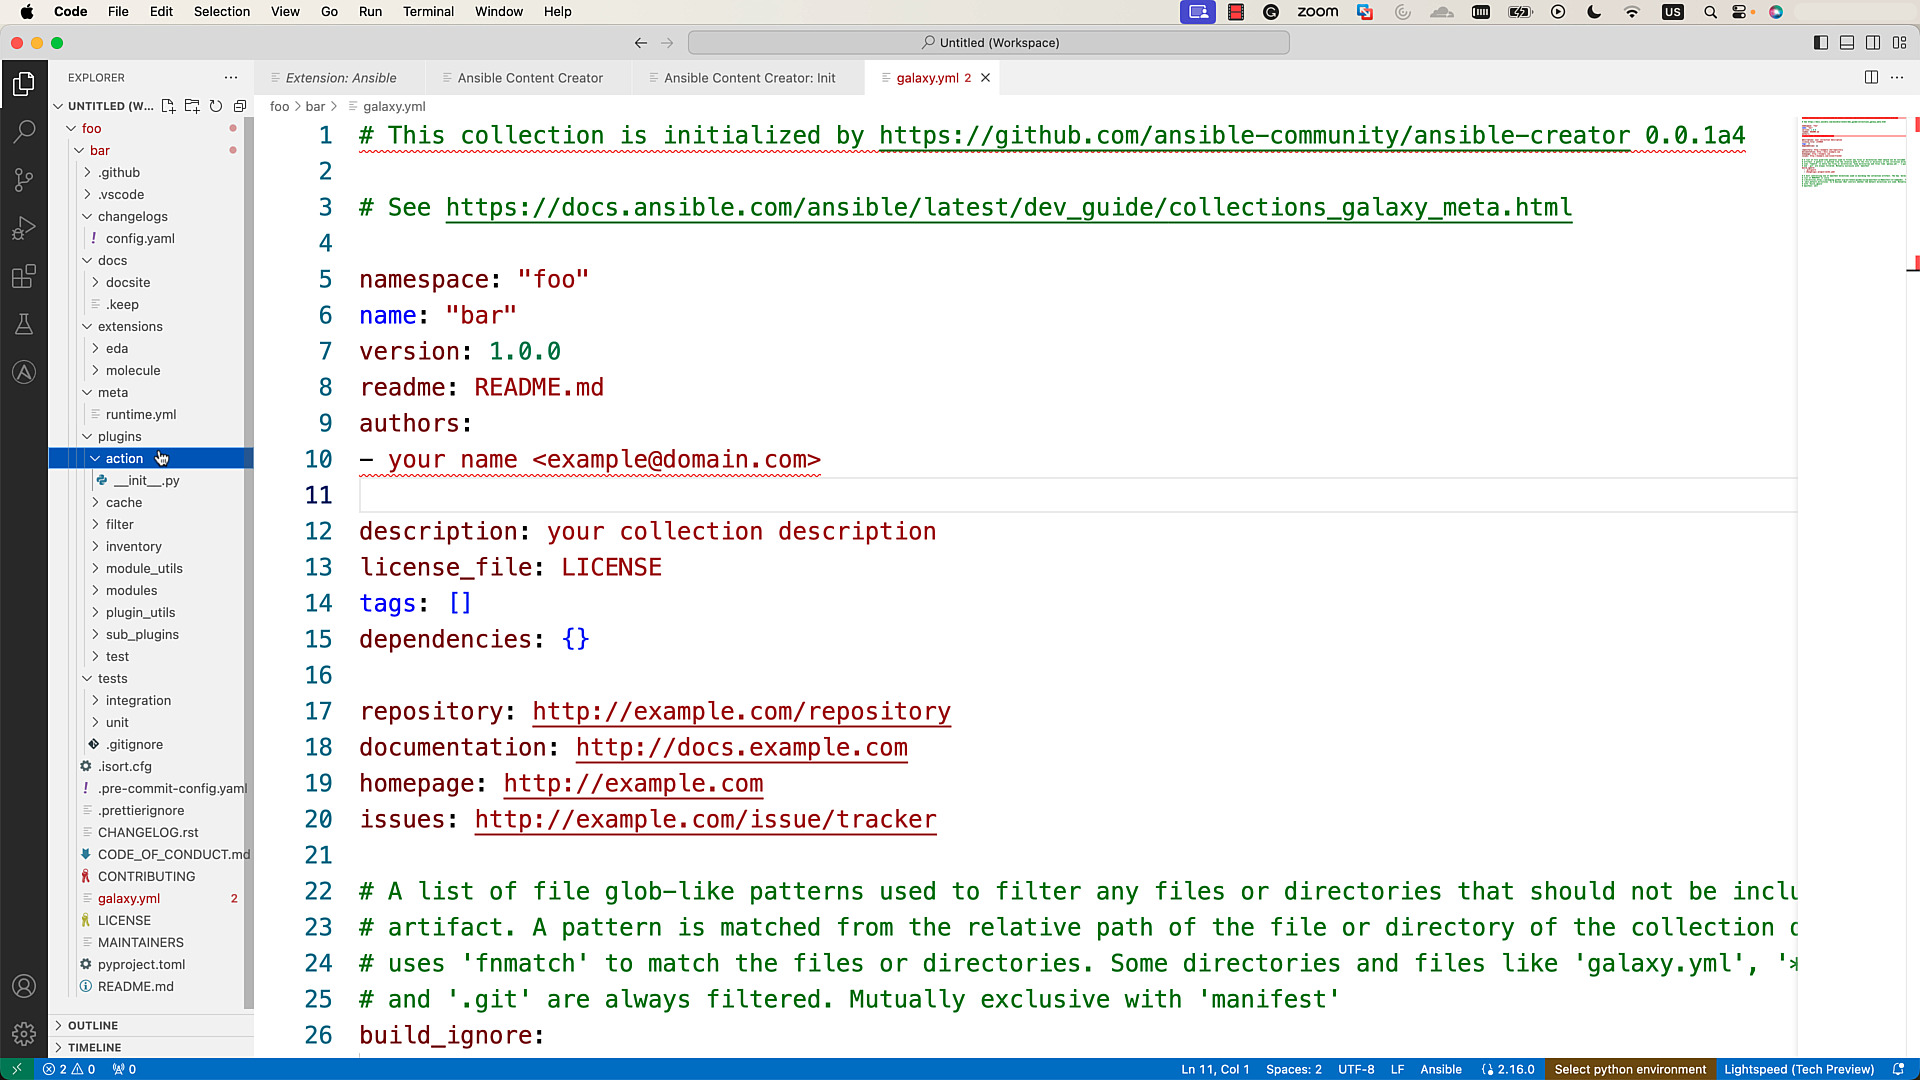
By leveraging the extension’s language service features such as syntax-highlighting, auto-completion, linting, and go-to definitions, you can enhance the development process seamlessly.
Conclusion
In conclusion, the combination of ansible-creator and the VS Code Ansible extension offers a powerful and user-friendly way to create and manage Ansible Collections for those who prefer a graphical interface. This integration simplifies complex tasks, providing an efficient and accessible solution for Ansible automation enthusiasts.
Academy
Learn the Ansible automation technology with some real-life examples in my
Udemy 300+ Lessons Video Course.

My book Ansible By Examples: 200+ Automation Examples For Linux and Windows System Administrator and DevOps

Donate
Want to keep this project going? Please donate